Introduction
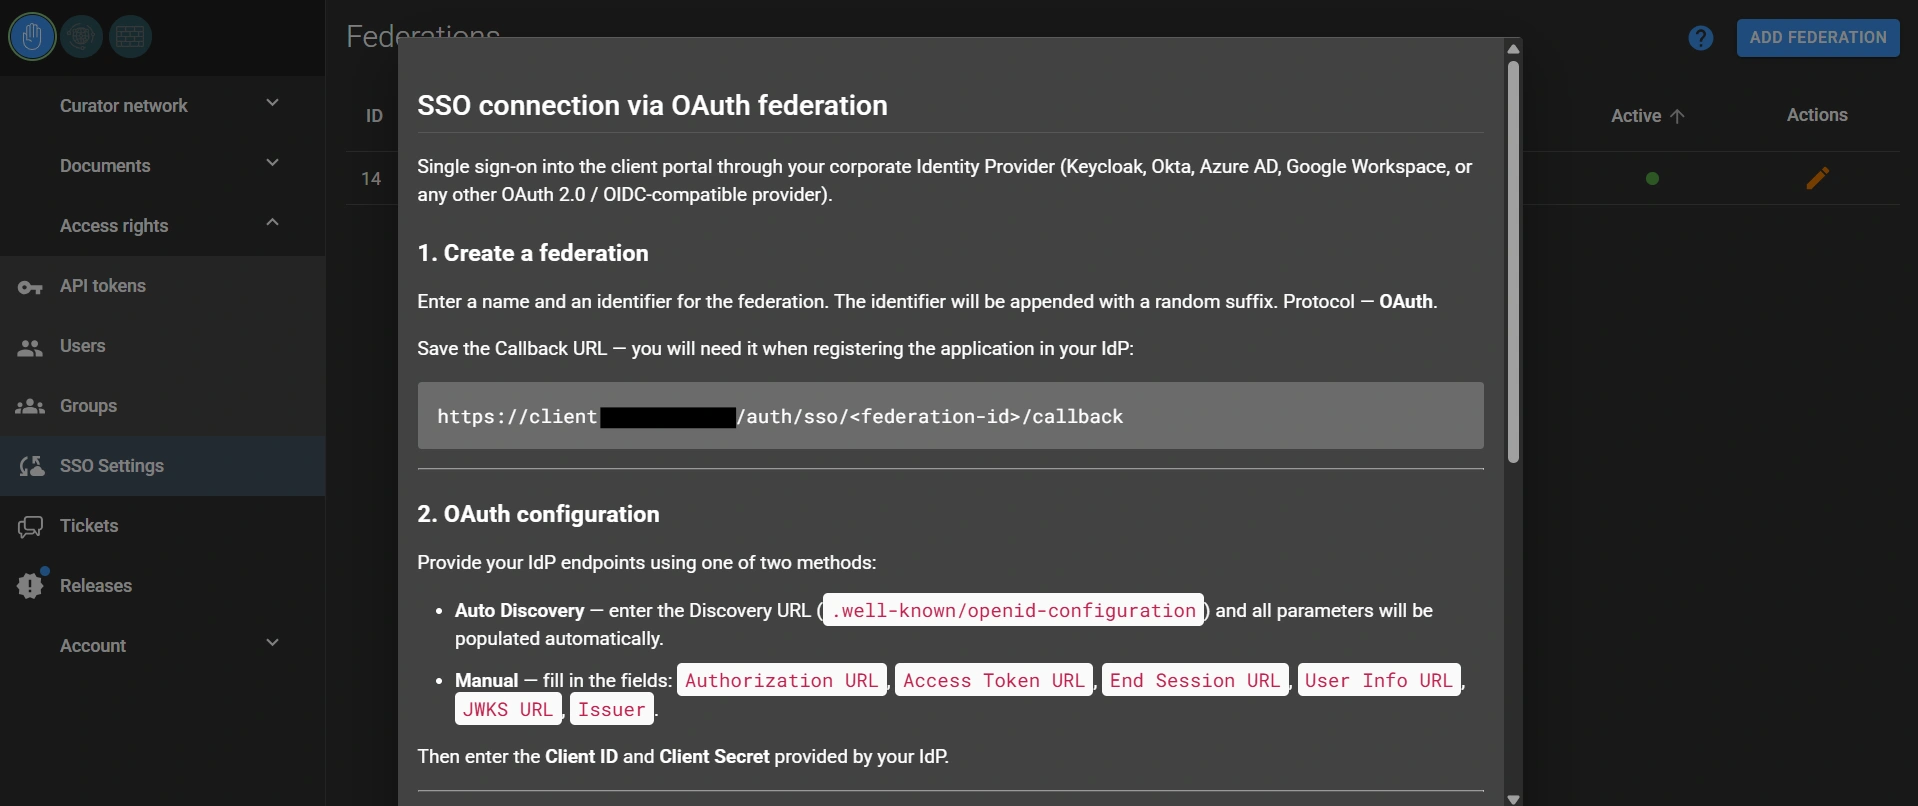
Qrator Labs supports user authentication through identity federation using the OAuth 2.0 and OpenID Connect (OIDC) protocols.
This is a standard mechanism for implementing single sign-on (Single Sign-On, SSO), a technology that allows users to access multiple systems without using separate usernames and passwords for each one.
This approach is called identity federation: user credential information is stored by a trusted identity provider - Identity Provider (IdP), while Qrator Labs acts as the Service Provider (SP) and delegates authentication to the external system.
If your organization already uses a centralized user and access management system, such as Microsoft Active Directory, Keycloak, or Google Workspace, you can use it to authenticate employees in the Qrator Lab’s account. In this case:
- there is no need to create separate user accounts in Qrator Labs;
- access management remains within your infrastructure;
- users sign in using their corporate credentials.
SSO workflow
Below is a simplified diagram of user authentication via SSO using OpenID Connect:
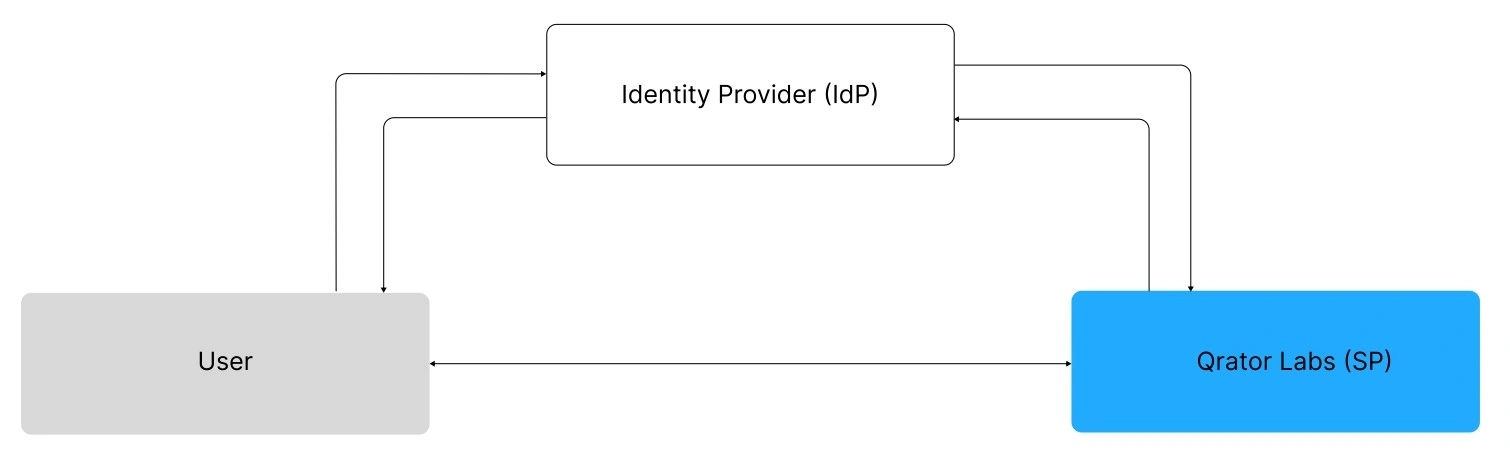
Diagram components
- User - an employee of the organization
- Qrator Labs (SP) - the service providing access
- Identity Provider (IdP) - the authentication system
Authentication flow
- The user initiates sign-in via SSO;
- Qrator Labs redirects the user to the IdP;
- The user authenticates;
- The IdP returns the user with a token;
- Qrator Labs verifies the token and obtains the user data;
- Group mapping is applied;
- The user is granted access.
Key features
- Authentication takes place entirely on the IdP side;
- Qrator Labs does not access the user's password and connects to the IdP from the IP address 185.65.149.86;
- The interaction is implemented via redirect (through the browser);
- Access is determined based on the attributes sent by the IdP;
- Existing groups will be overwritten with the groups that the IdP sends to Qrator Labs;
- Access to the account for previously created user accounts will be preserved.
Overview
SSO configuration through OpenID Connect is available in the Qrator Labs account.
After configuration:
- users authenticate through the IdP;
- local user accounts are not created;
- access is managed through groups and policies.
How OpenID Connect works
OpenID Connect is a protocol that adds authentication on top of OAuth 2.0.
Prerequisites
Before you start configuration:
- an Identity Provider with OIDC support has been configured;
- the following are available:
- Client ID
- Client Secret
- OIDC endpoints or Discovery URL
Configuring SSO in Qrator Labs
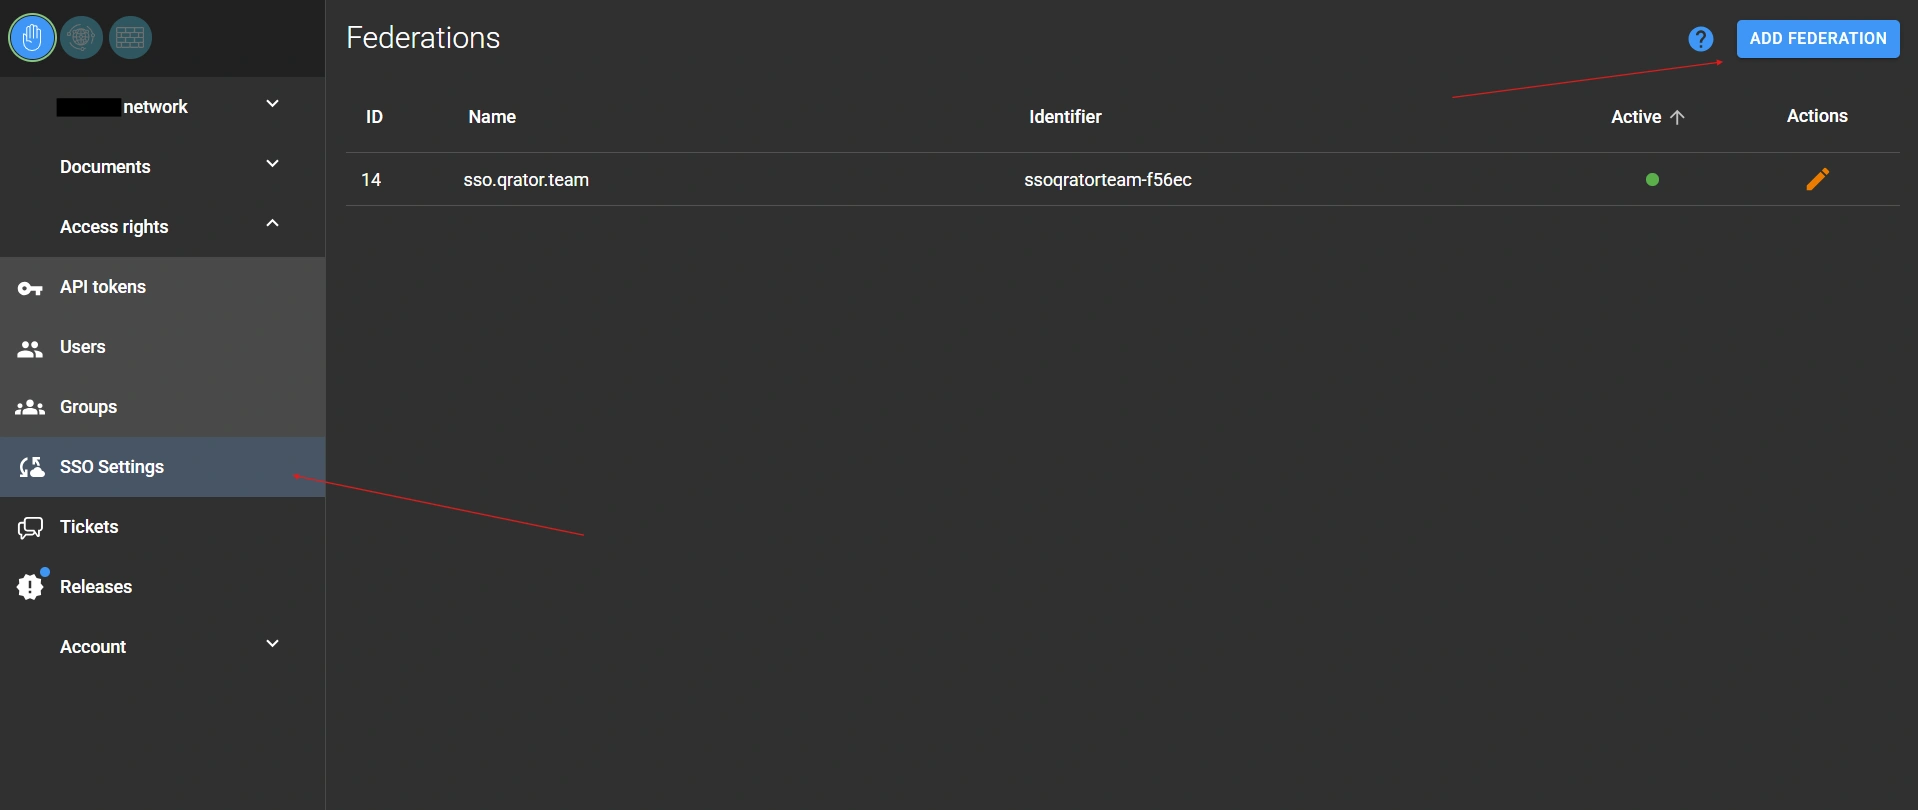
1. Go to SSO settings
Go to the SSO Settings section and click Add federation.
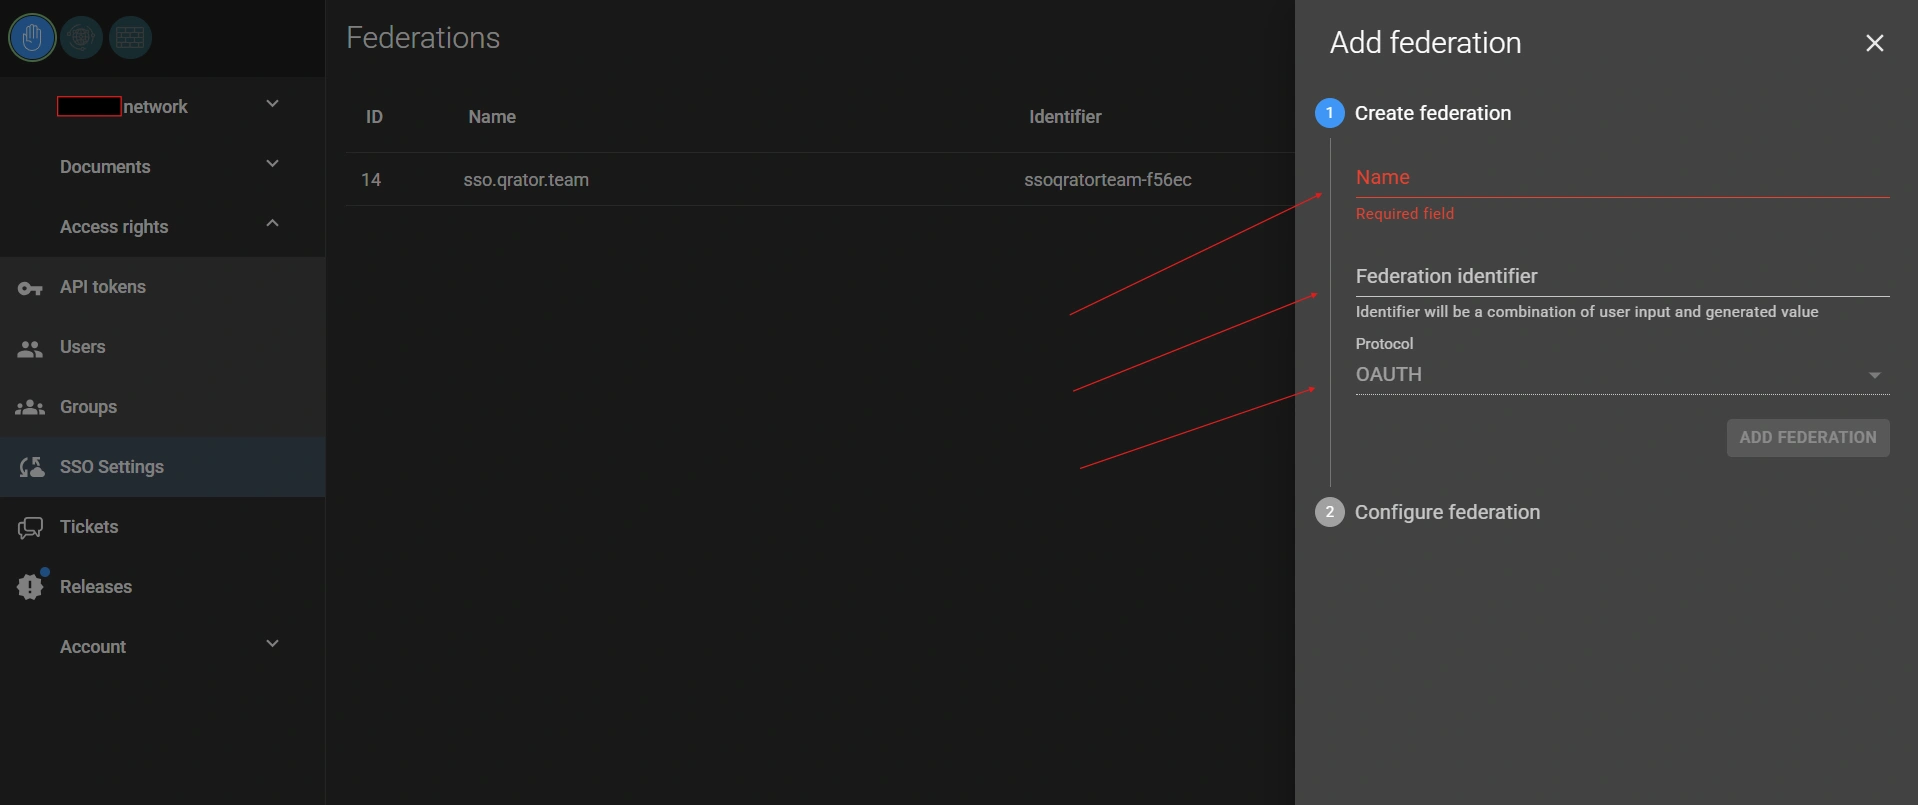
2. Create a federation
Specify the parameters:
- Name - any value;
- Federation identifier (slug). The identifier will be supplemented with a random suffix;
- Protocol - OAuth.
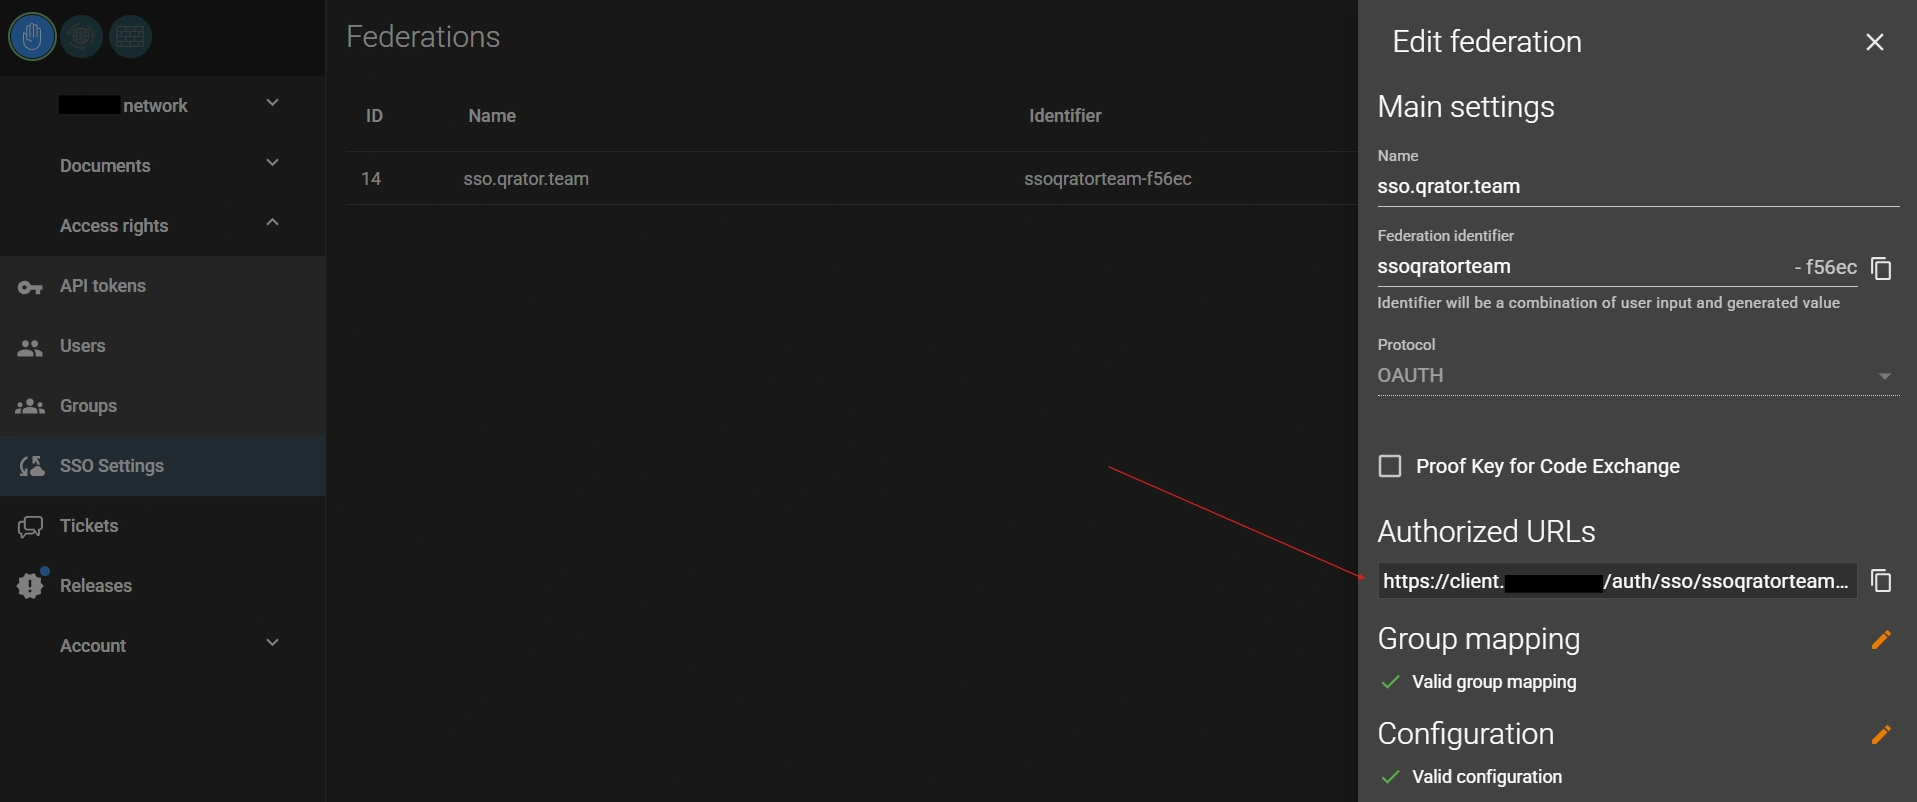
3. Obtain the Authorization URL
After the federation is created, the Authorization URL (Redirect URI) will be displayed. This URL must be specified in your Identity Provider settings.
4. Configure group mapping
Go to the Group binding section and configure the mapping between IdP groups and Qrator Labs groups.
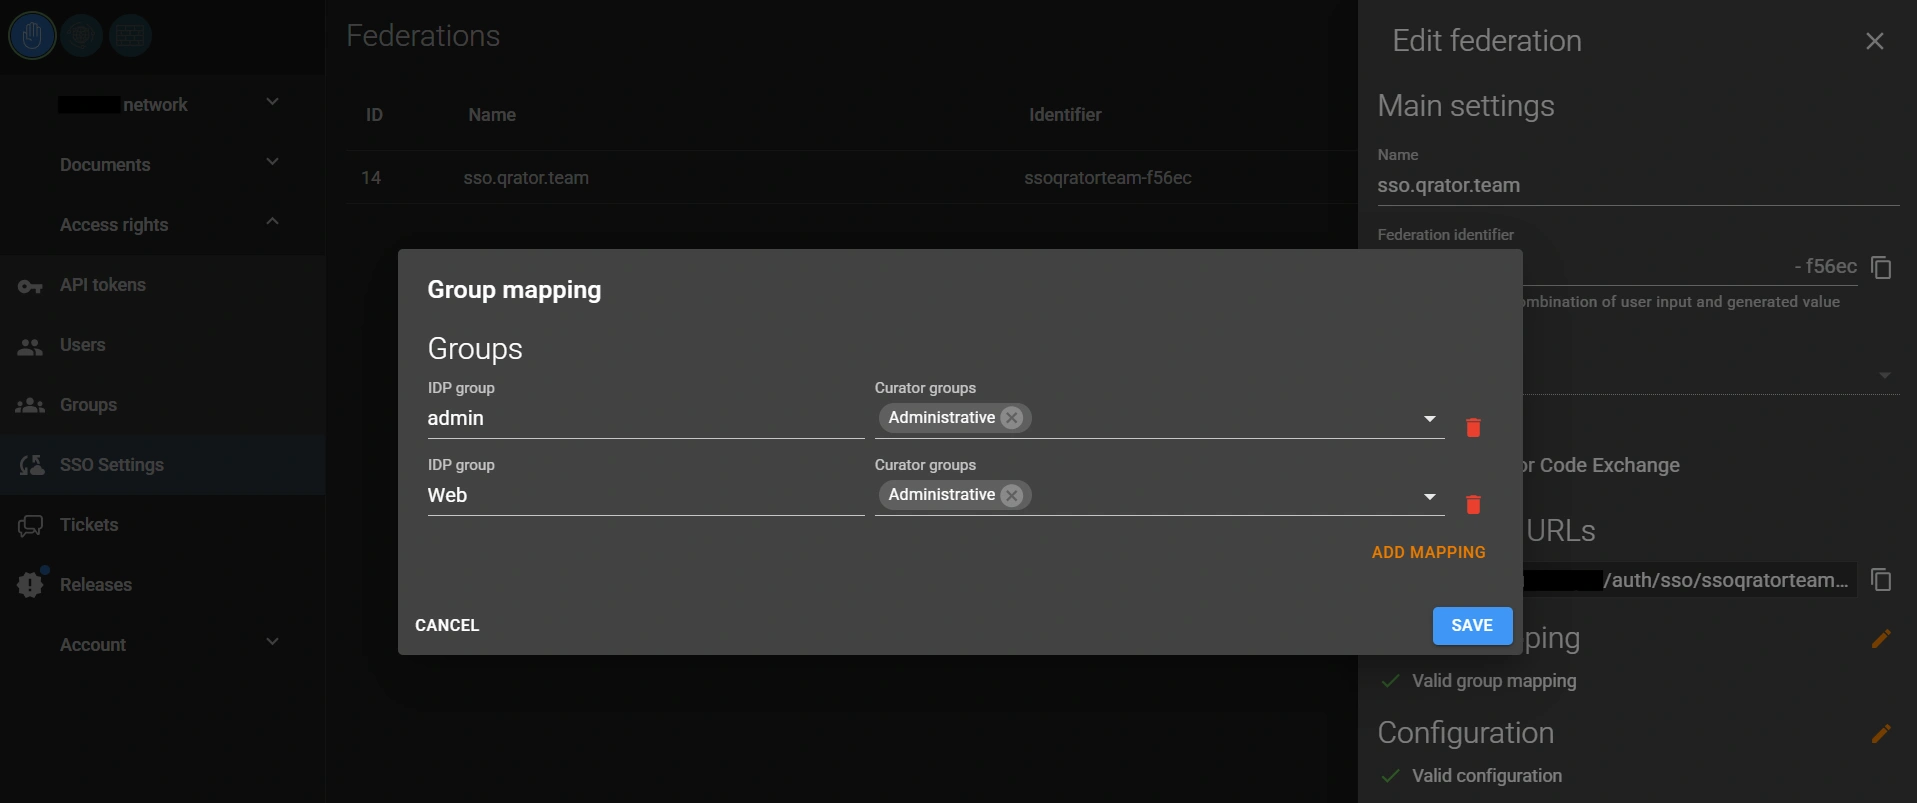
IMPORTANT! Without group binding configured, users signing in via SSO will not receive roles and groups. This step is required for correct operation.
Make sure the mapping includes a group that corresponds to the Qrator Labs group with user management permissions (Access Manager by default). Otherwise, administrators may lose access to user management at their next SSO sign-in.
5. Configure OAuth settings
Go to the Configuration section.
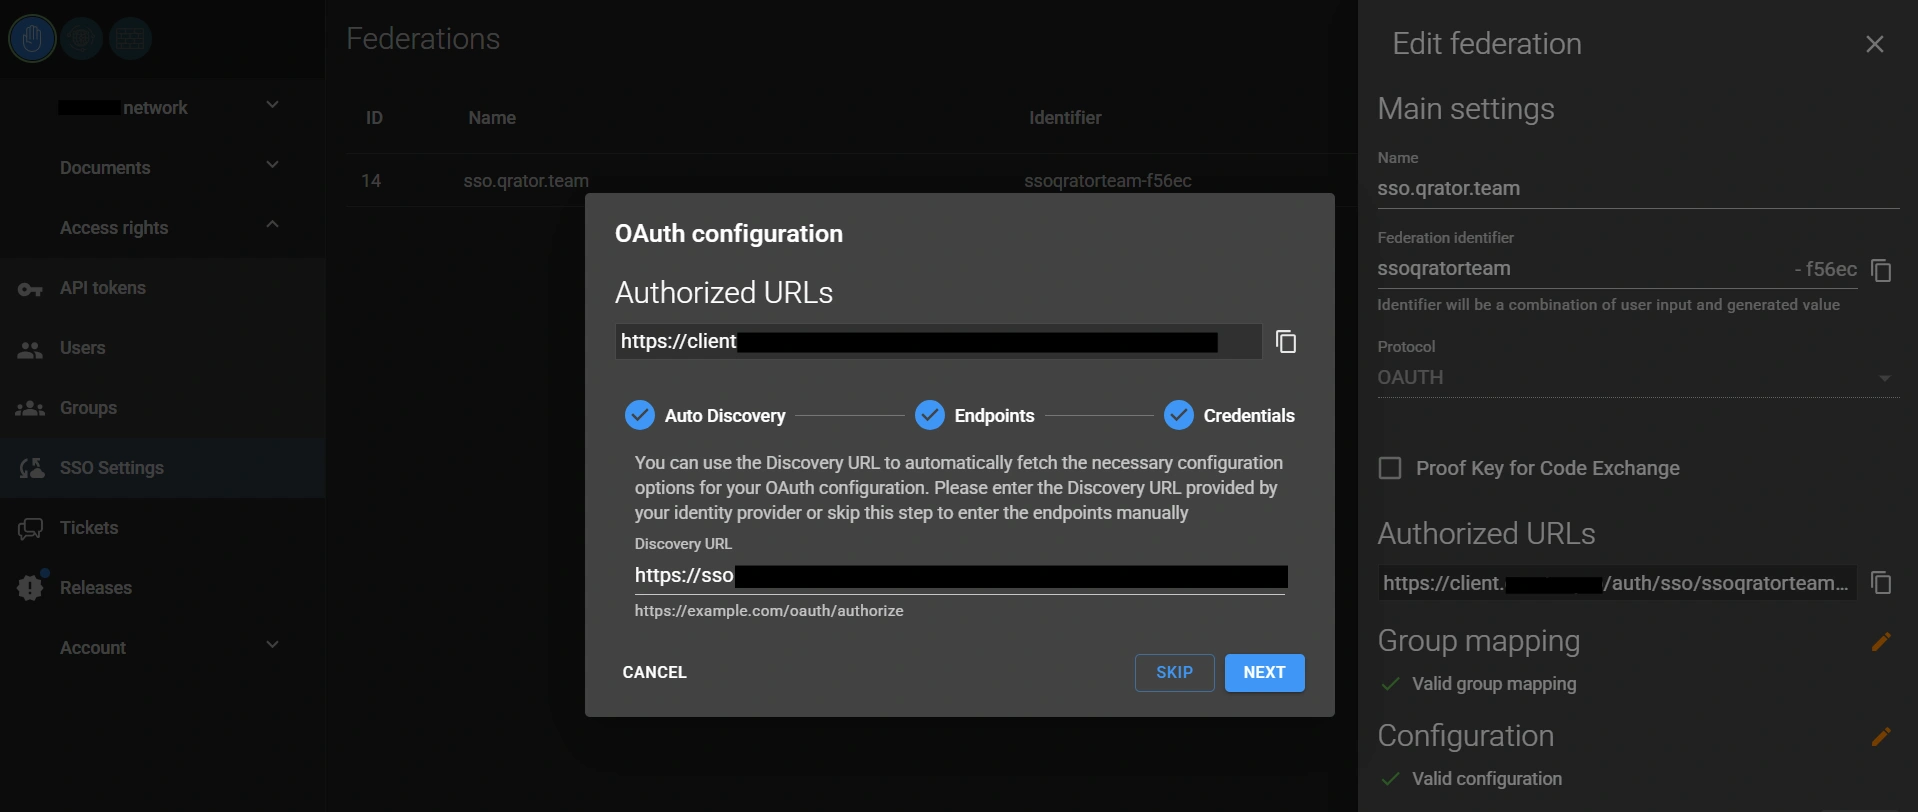
6. Specify endpoints
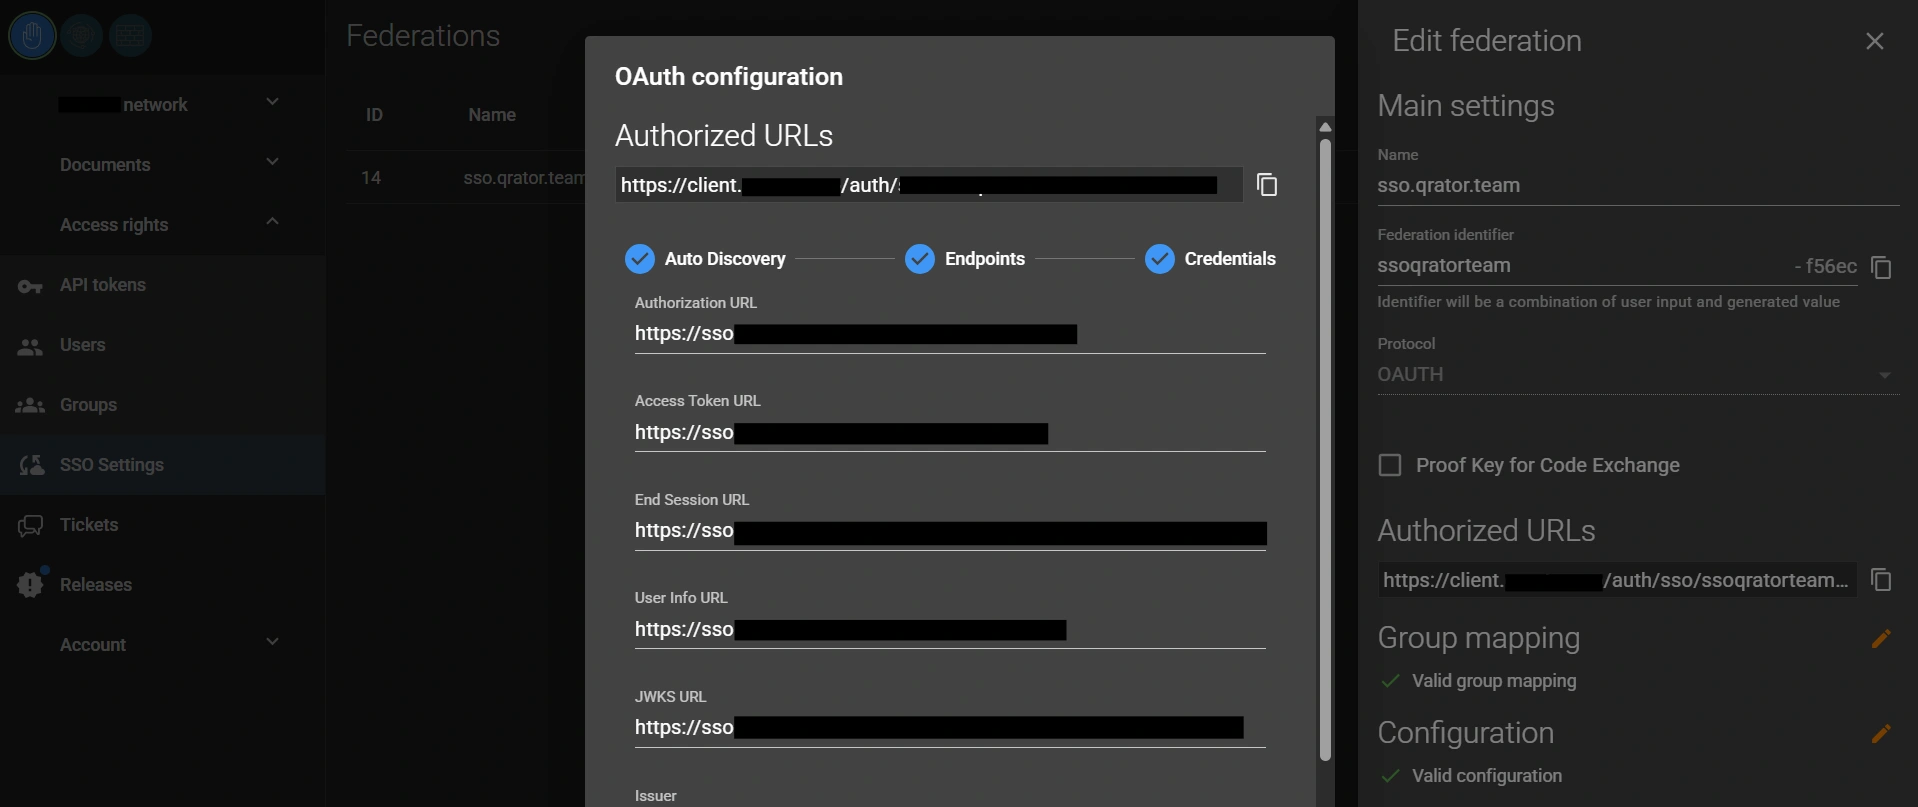
Specify your Identity Provider endpoints:
- Authorization Endpoint
- Token Endpoint
- UserInfo Endpoint
- JWKS Endpoint
- Logout Endpoint
Or use the Discovery URL ( .well-known/openid-configuration ); the parameters will be populated automatically.
7. Specify credentials
Enter the access parameters:
- Client ID
- Client Secret
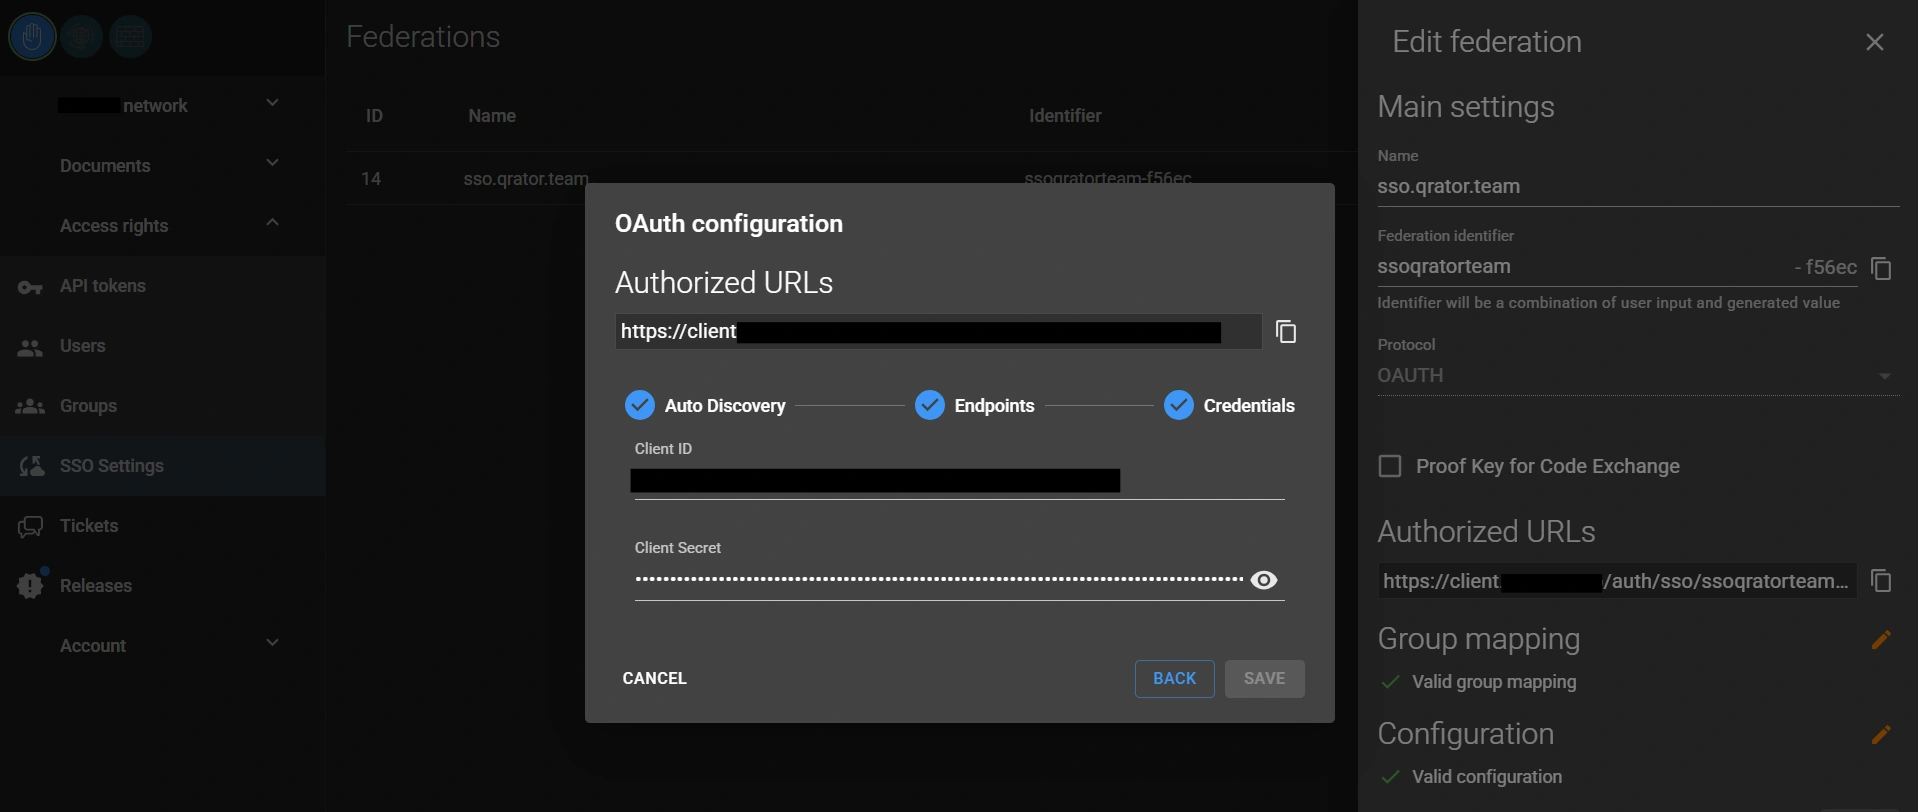
8. Complete the configuration
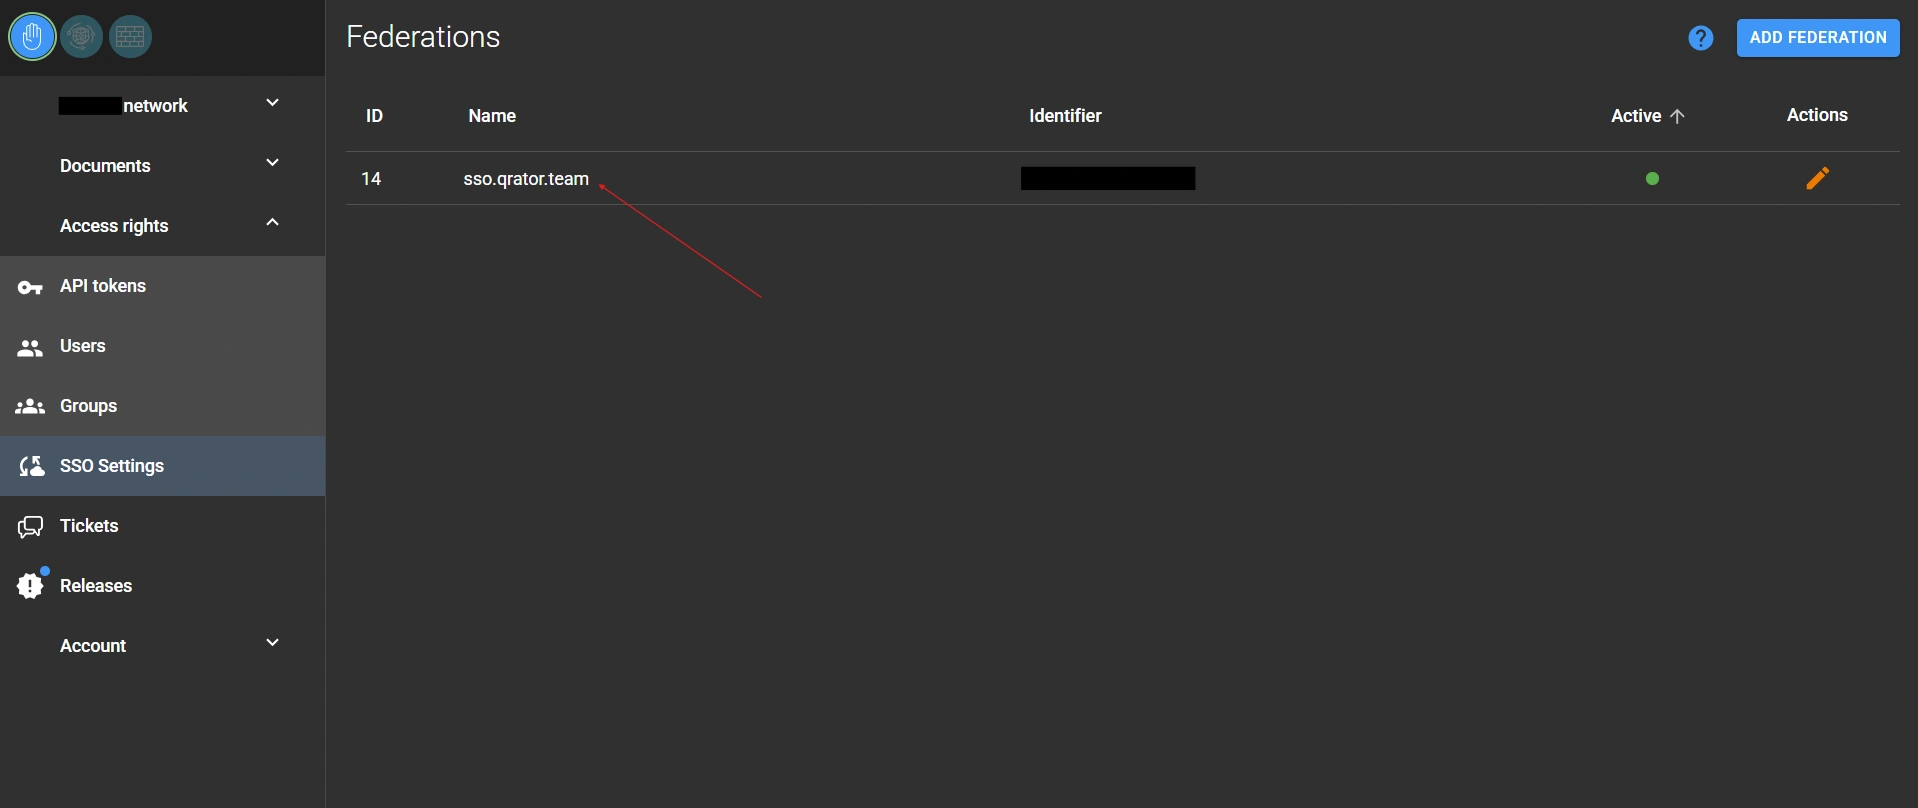
Save the configuration. After that, the federation will appear in the list and become available for use.
Additional information
The account interface includes built-in instructions for configuring SSO.