Note
In the default configuration, this section of the personal dashboard is available only to users in the Administrative and Technical groups. Editing the settings is available only to users in the Technical group.
In the Error pages
section of the dashboard, you can upload your own pages, which the Qrator Labs reverse HTTP proxy will display when errors 403 Forbidden, 502 Bad Gateway, 503 Service Unavailable or 504 Gateway Timeout occur. All settings are valid only for the current domain or service.
How it works
For the reverse HTTP proxy to use a page as an error page, it must be uploaded as a file with the html extension.
To show the same error page for all error types, use the index.html filename. To show unique pages for different error types, use the error code in the filename, for example: 502.html.
If you need to show localized error pages to users that prefer different languages, specify the language in the filename, for example: 502.en.html. The language will be detected based on the Accept-Language header from the user's browser, for example: en, ru, es.
If additional images or other files are needed to display the pages, you can upload them in this section, too. When including the files into the error page code, start the URLs with /qrerror/, for example: /qrerror/favicon.ico, /qrerror/images/logo.png. Resources located on other URLs may be unavailable when the error occurs.
Resources that are executed in the user's browser (JavaScript code, Flash or Silverlight elements) can be used. Resources that are executed on the server side is not supported for error pages.
Note that the uploaded error pages are only shown when the reverse HTTP proxy yields an error by itself (see Redirection with cookie installation, Load balancing). Errors yielded by the protected server are shown without modification.
Example
Let's assume that all upstreams failed to respond to a request, and, following the error processing algorithm, the user now needs to be shown the 504 Gateway Timeout error message. Let's also assume that the user has English language selected in their browser.
In this case, the reverse HTTP proxy will go through the options in the following order: 504.en.html, 504.html, index.en.html, index.html, the default page. The user will be shown the first page it finds.
View error pages
-
Select the domain in Domains or service in Services.
-
Select Error pages.
-
Click on the URL next to one of error codes.
A page will open in a new browser tab that users will see when the corresponding error occurs.
Replace error pages
-
Select the domain in Domains or service in Services.
-
Select Error pages.
-
Click Edit.
-
In the file management dialog box that appears, create the necessary file structure.
All pages must be in the root folder, and their names must follow the rules described above in How it works. If additional images or other files are needed to display the pages, you can upload them in this dialog, too.
The following buttons are available in the file management dialog box:
-
Create folder — Create a new folder in the current folder.
-
Upload files — Upload one or more files into the current folder. Files to be uploaded are selected using the system dialog box.
-
Upload archive — Upload a Zip archive and unpack it to the root folder. The archive to be uploaded is selected using the system dialog box. Only Zip archives are supported.
-
Download all — Download Zip archive with the full contents of the root folder.
-
Delete all — Delete all the contents of the root folder permanently.
Click any file name to open its preview in a new tab, or click the button to copy the preview link. Note that preview by this link is available only after logging into your account.
There is also a menu next to each file with the following items:
-
Download - Download the selected file.
-
Delete - Delete the selected file permanently.
All changes made in this dialog box are saved automatically and become visible to users after a few minutes. To close the dialog box, click Apply.
-
Configuration example
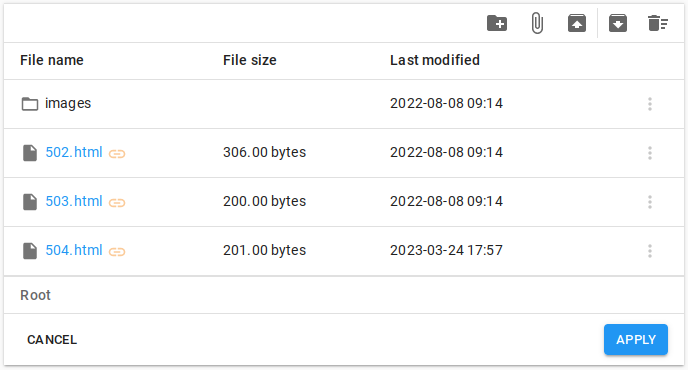
In this example, three error pages are loaded. Also loaded is the images folder with the images needed for these pages.